
Homebrewing
Brewing Beer All Grain: A Step by Step Guide
This guide is designed for someone wanting to brew their first beer from using all grain. You might have brewed with kits or using malt extract before or you might be taking the plunge straight into all grain brewing. The below recipe is designed to be an easy introduction into brewing with all grain and will produce a citrusy American pale ale if you use Citra or a floral, earth English Pale ale if you use Pilgrim.
It will take around 6-7 hours to brew so you’ll need a day set aside and it will be ready to drink in about two weeks.
Ingredients
3.5Kg Pale Malt
250g Wheat Malt
300g Crystal Malt 20L/Caragold
100g Citra or Pilgrim Hops
One Packet of Nottingham Danstar Ale Yeast
Beer Info
Estimated Original Gravity – 1.046
Estimated Final Gravity – 1.011
Est ABV – 4.7%
Equipment
Hot Liquor Tank (at least 20l capacity)
Mash Tun
Brew Kettle (at least 30l capacity)
Wort Chiller
Fermentation Vessel - 23 litre
Airlock
Brewing/Cooking Thermostat
Kitchen Scales
A large plastic spoon
Sterilizer
Hydrometer
Bottles
Equipment Description
Hot Liquor Tank
A hot liquor tank is a metal container you can heat water up in. For homebrewers I recommend just getting a large soup pan you can heat on a stove.

Mash Tun
This is a container where we mix malt and water to create a sort of porridge brewers call a ‘mash’. Homebrew mash tuns are either converted coolboxes with filters (see below) or insulated stainless steel vessels. They’re available from any homebrew supplier.

Brew Kettle
The brew kettle is where you boil in your hops to give your beer flavour and aroma. You can buy electric induction brew kettles which are essentially giant water kettles, but I use a large converted soup pan that I heat on my stove.

Wort Chiller
This is a long coil of copper or stainless steel used to cool your wort. It usually connected to your taps through hose pipe connectors. By then running cold water through it when it is submersed in your wort it will quickly cool it down.

Fermentation Vessel
In commercial brewing this is large metal container where the yeast ferments your beer and makes alcohol. There are metal homebrew versions which do have advantages but are pretty pricey. When starting out I would recommend a plastic fermenting vessel, they are just plastic tubs with a small tap on the bottom for bottling.
Airlock
A small plastic tube with bends and twists, add a little water and it stops air getting into your beer but allows CO2 to escape, this protects the beer from getting infected.


Hydrometer
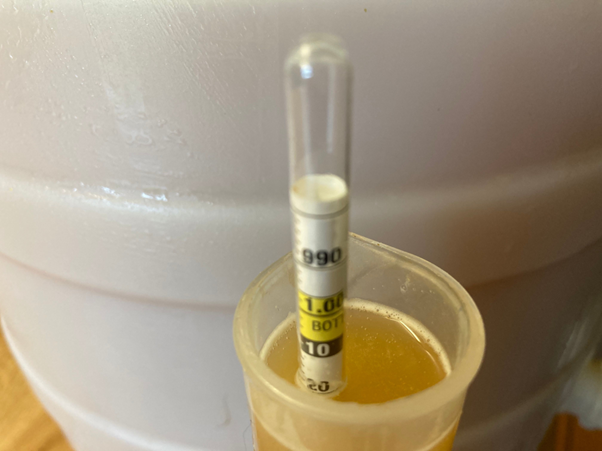
This is a device used to calculate the ABV of beer. It’s a glass tube than you slot into a testing vial of beer. The hydrometer will float in the beer and floats higher the stronger the beer is. There are readings down the side of the hydrometer. Where the beer meets the air will give you the beers gravity reading. For this recipe you’ll be taking a reading before and after fermenting to ensure your beer is fermented and ready for bottling.

The Process
1.Clean all your equipment; avoid using washing up liquid or any other chemical cleaner just use hot water. Equipment at this stage does not need to be sterile, just clean.
2. Boil a kettle full of water (about 1.5l) and add this to the mash tun, close the mash tun lid. This warms up the mash tun which helps later.
3. Boil another kettle of water and put a jug of about 1l of water in the fridge.
4. Weigh out your grains and hops.
5. Heat up 10.5L of water in your hot liquor tank to 70 degrees Celsius.
6. Empty the boiled water from your mash tun and add 1Kg of grains and 1.5l of the now hot water from your hot liquor tank. Stir until all grains are wetted. Repeat until all grains are used up; then add the remaining hot water and stir. You now have a mash, which will look like a giant bowl of porridge. Check the temperature. You’re aiming for 65-67 degrees, add your boiled or chilled water to get to this temperature if you’re off.
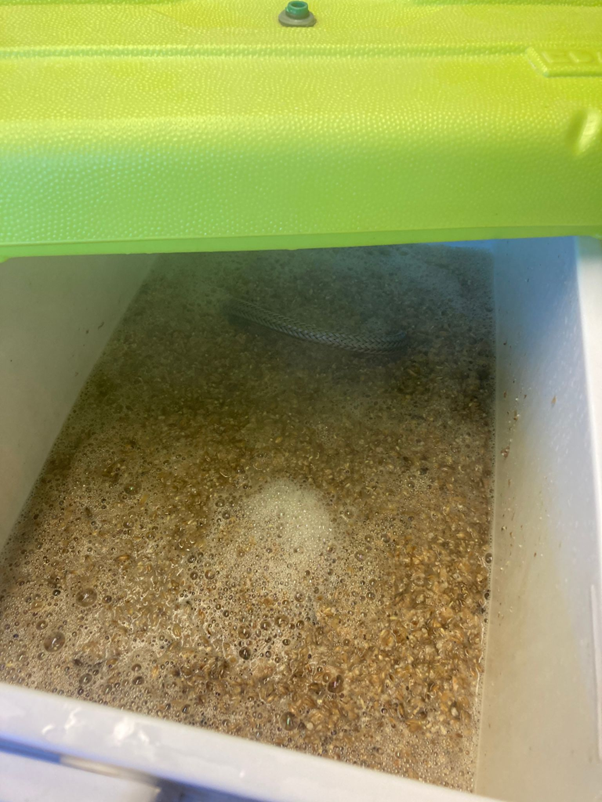
Malt and water mixed into a mash inside the mash tun
7. Start heating up 19l of water in your hot liquor tank to 75 degrees Celsius, this is your ‘sparge’ water.
8. Check the temperature on your mash after 20 and 40 minutes, if it’s fallen below the target temperature add some more boiling water to get it back up. After one hour the mash is complete.
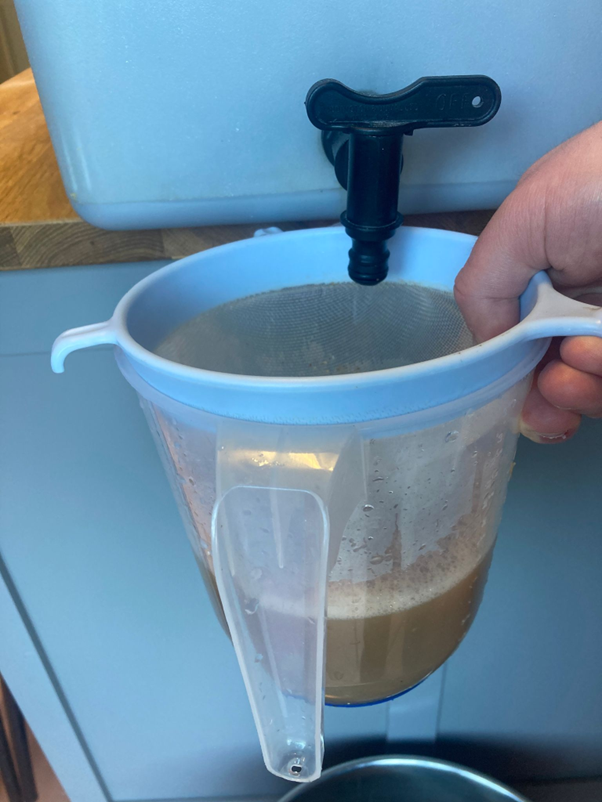
9. Draw some mash water into a clear jug. It will have floating bits of malt in it. Pour this back in your mash tun and draw another jug. Repeat until the liquid drawn from the mash tun is clear. Then drain the liquid into your brew kettle. (Optionally, you can use a sieve as below.)
10. Add the sparge water from your hot liquor tank to your mash tun and stir this mixture. Leave this for 15 minutes.
11. Repeat step 9.
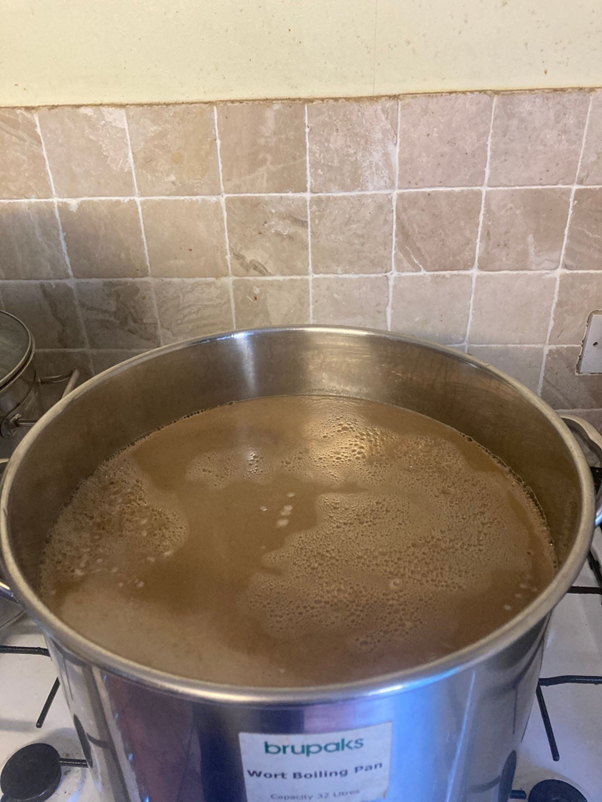
12. In your brew kettle you now have what is called wort. Put the brew kettle on to boil, this will take a while.
13. What’s left in your mash tun is spent grain. This is a waste product and of no more use. Clean the mash tun out with a jug or large spoon or ladel. This spent grain is great for a compost bin.
14. Once your wort has started boiling, add 10g of hops (citra or pilgrim, whichever you’re using).
15. After the wort has been boiling for 55 minutes, add the remaining 90g of hops. At this point, put your wort chiller in your kettle.
16. After the second lot of hops has been in for five minutes turn off the heat, the boil stage is now over.
17. Start running cold tap water through your wort chiller. You want to bring the wort down to about 18 degrees Celsius, this will take a while so be patient.
18. As your wort is chilling sterilize your fermenter. There are lots of different sterilizers available from homebrew suppliers, use them as directed.
19. Once your wort is chilled take a hydrometer reading. This is estimated at around 1.046 but if yours is a bit lower or higher don’t worry too much it just means it’ll be a bit stronger or weaker when finished.
20. Transfer your wort to your fermentation vessel and add the yeast. Secure your airlock and fill halfway up so there is not a continuous airflow from outside to the fermentation vessel.
21. Leave the beer to brew for a week to ten days. Take another hydrometer reading and make a note of it. Leave the brew another two days and take another hydrometer reading, if it is the same as the previous hydrometer reading, then the beer has finished fermenting and is ready to be bottled, if the hydrometer reading is lower than the previous reading you should leave the beer to ferment longer and come back in another two days and take another reading.
Repeat this process until you get two readings that are the same with a two day gap. For this beer the estimate if a final gravity of 1.011, but don’t worry if you finish slightly over or under this, it is just an estimate.

22. For bottling I recommend PET bottles, you can get these from any homebrew supplier and they look like plastic pop/soda bottles. These are ideal because you can just screw the caps on and you don’t need a bottle capper and being plastic they are safe to handle. You can also use glass swingtop bottles or you can wash out empty beer bottles and buy a capper to seal them with a crown cap.
If you are using glass bottles it’s imperative you make sure your fermentation is completed by taking the gravity readings as explained in stage 21, bottling a beer which is not fully ferment can cause glass bottles to explode.
23. When bottling, add ½ teaspoon of table sugar to your bottle and then pour in your beer leaving a little bit of headroom.
24. Leave your beer in a cool place for about a week and after this it will be nice and carbonated. Crack open a bottle and enjoy!